Frosty joined our family this Christmas and it will be sad to pack him up. I just wanted to say good-bye to Frosty and Happy New Year to you all! I'm excited to see what new projects 2011 will bring and all the things I'll learn from my friends in the blogging world.
Tuesday, December 28, 2010
Tuesday, December 21, 2010
Bubble Magnets
 | |||
| {I added the magnets on my photo frame} |
 |
| Lookin good on Becky's fridge |
 | |||
| An up close view of the magnets |
 | |
| The last one is in the bottom corner |
She said is was so simple to make!
{Supplies}:: magnets
:: clear floral stones
:: hot glue gun
:: glue stick
:: scrapbook paper
:: Scissors
::pencil
Steps 1: Trace around the rock with a pencil onto the scrapbook paper. Then cut the circle out. Use a glue stick to glue paper on back of a floral stone.
 |
| Becky added a letter sticker "B" to the paper |
 |
| I used the same magnets for my advent calendar |
Thank you Becky for the great gift:)
Merry Christmas Everyone!
Friday, December 3, 2010
{Joy Burlap Birds}
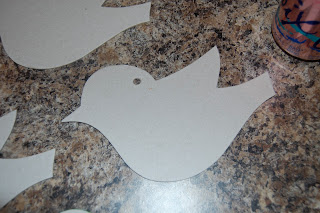
I found these birds at Michaels for $1.00 and I grabbed them! When I started decorating for Christmas I realized a banner would be perfect for my mantel so I gave it a try.
{Supplies}
1. Birds from Michaels or any other cut shape on cardboard. You need to add a hole punch if your shape does not have one.
2. Burlap
3. Glue gun
4. Glitter
5. String and needle
{Step 3}
:: Glue Burlap birds onto paper birds with glue gun. Glue the other side on. Two birds per paper bird {front and back}
{Step 4}
:: Apply glue from the glue gun to edges and sprinkle in glitter
{Step 5}
:: Add letters. I used my Cricut machine to cut our my letters and shapes. I also used my new Cheerful Season font by Creative Memories for the snowman and snowflake cut out. You can also trace your letters or use stencils.
{Supplies}
1. Birds from Michaels or any other cut shape on cardboard. You need to add a hole punch if your shape does not have one.
2. Burlap
3. Glue gun
4. Glitter
5. String and needle
 | ||||
| Supplies |
{Step 2}
:: Trace the bird onto the burlap with a light colored marker. Total 10 birds.
:: Cut bird out
 |
| Bird traced with yellow marker |
:: Glue Burlap birds onto paper birds with glue gun. Glue the other side on. Two birds per paper bird {front and back}
{Step 4}
:: Apply glue from the glue gun to edges and sprinkle in glitter
{Step 5}
:: Add letters. I used my Cricut machine to cut our my letters and shapes. I also used my new Cheerful Season font by Creative Memories for the snowman and snowflake cut out. You can also trace your letters or use stencils.
 |
| The Cheerful Seasons Shapes |
 |
| This is what the Cheerful Sesaons cartridge looks like |
My sister's mother in law is an amazing Creative Memories consultant and you can check out the great products at: http://www.mycmsite.com/sites/beckyomel
I love Creative Memories Products!
 |
| Cute snowman cut out |
{Step 5}
:: String on ribbon or twine. I used a needle and twine. I threaded the twine through the hole that was on the bird.
{Step 6}
:: Hang up
 |
| {Joy to the World a King is Born} |
Jesus brings our family {JOY}
Subscribe to:
Comments (Atom)


