Tuesday, November 30, 2010

Music Photo Canvas

{Fun way to display old photos}
{I hung it up in the upstairs hallway}
These are two music sheet canvases I made. I got the idea from Jones Design Company. Once again she gives an amazing tutorial and I loved my first one so much I made two:)

Supplies:
1. Mod Podge
2. Paint brush
3. Book pages and or music sheets. I purchased old music sheets and old books at Goodwill.
4. Canvas- I bought the canvas with rod iron for $4.99 and canvas shown above for $1.99 at Goodwill:)

Step One:
1. Lay down paper and Mod Podge on till canvas is covered. I then went around the edges and folded the paper to the back. I wrapped the edges like wrapping a present.

Step two:
2. Let it dry. It starts to dry with wrinkles but when it drys it looks good so don't worry:)
{All dry and only a few wrinkles!}


Step 3: Hang up
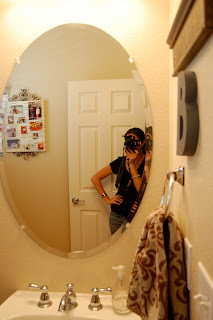
{A fun shot from our downstairs bathroom}
{I heart Rod Iron}
What do you think? Are you inspired and if so Mod Podge away!

Friday, November 19, 2010

{Give Thanks}


I starting looking on blog land for a good Thanksgiving craft since I only have a few Thanksgiving home decor items. I found this one: At Second Street titled Give Thanks Banner- Free Printable. {Thank you Kalleen for such a great banner!} I did a fun twist by printing my letters on used grocery bags because I wanted a more vintage look.

Supplies:
1. Grocery bags or card stock/scrap book paper
2. Printer
3. Ribbon

Directions:
1. Print letters on paper and cut them out. I left a border around my letters. {I used grocery bags or you can use card stock/scrap book paper}


 2. Whole punch the top of letters. {I added eyelets to my punched holes to add color with a  Crop-A- Dile tool}
These are eyelits
A Crop-A-Dile Tool
3. String ribbion through the top {I used twine ribbon}

As a family we created a list on what we are thankful for!

{Family, Friends, Church, Summer, Our House, Family Trips, Milk, Night Night, Preschool, Bikes, Pizza, Curious George, Wrestling, Jesus, Yogurt and Blocks}

My 2 year old Landon and 4 year old Carter thought this was so fun!

Thank you for reading my blog!

Sunday, November 14, 2010

Book Christmas Ornament

:{Supplies}

:: book pages
:: Small Wreath. I used a foam wreath that I found at Michaels. It was a pack of 24 wreaths for $5.00
:: glue gun
:: string for hanging {I used ribbon and twine}

{Directions}
1. Fold and tear book pages
I folded the paper in 1/2 then in 1/4's then in 1/8's. I then tore the paper on the folded lines.
2. Cover wreath with book pages. I used 1/8 squares of a page to cover the green wreath. I attached the paper with my glue gun.
3.  I then folded the 1/8 paper in half=1/16 and cover the wreath on the front. I then covered the back with the 1/16 folded paper.
{I heart coffee}
{Up Close View}

3. Add Spiral Rose
{This video was made in one shot....between the kids and the dogs I gave it a try so you can make a great spiral rose}

{Spiral Rose Video}


{If you can't see the video click here: http://www.youtube.com/watch?v=4ZWajw2Kvcw}

4. Hang on Tree:

What great Christmas presents! 
 {I made 20 so far for the kids teachers and family members:}

I linked with Cottage Instincts this week for this project. { #9 on her site}


Wednesday, November 10, 2010

Puzzle Christmas Ornament

My son Carter made this one and it's the best one!
I got inspired yesterday to make some more Christmas ornaments after I received Jones Design Company Christmas Tutorial email. I made a few from her tutorial which were amazing but then I came up with this one because my kids wanted to make one.

{Supplies}

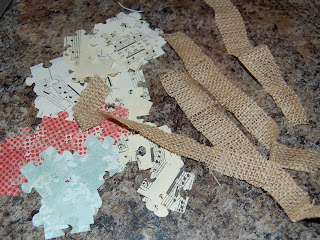
:: sheet music and scrap book paper- Make sure the paper is double sided {I used Christmas colored paper}
:: plastic ball which were .75 cents at Michaels.
:: puzzle punch or cut our any shape {Christmas tree, Ball, Reindeer}
:: string for hanging {I used ribbon, burlap strips and twine}

{Directions}
1. Cut/punch out shapes
2. Fill Ball with paper punches

3. Put top of ornament back on and tie string. Then hang up ornament:)

It is a very simple ornament but the kids loved every minute making them:) They are already asking me about what craft we are doing next.

Saturday, November 6, 2010

My Own Advent Calendar

My husband was out of town for 3 days this week so I had some free time at night when the kids were asleep.(I made this advent calendar and I'm so excited to open each day with the kids starting December 1st.) I found this great idea on the Somewhat Simple blog. Thank you so much Stephanie for sharing all you wonderful ideas. I can't wait to do a few more crafts from your site.

Supplies:
1. Glue gun
2. 24 Magnets
3. One -24 muffin pan
4. Scrapbook paper
5. Numbers 1-24 {stickers, Cricut machine}

Directions:

1. Cut 24 red stock {or any color} squares 2 1/4 inch x 2 1/4 inch
2. Cut 24 Christmas paper 2x2 inch squares {I used 5 kinds of paper}
3. Cut numbers out 1-24 {I used my Cricut to cut them, or you can use stickers}
4. Attached magnets to back with your glue gun
5. Fill days with fun activities, bible verses or a tiny piece of candy!
6. Enjoy with your family!
One more fun look:)

Thursday, November 4, 2010

Advent Calender


I have been searching in blog land looking for some good Christmas crafts. I saw this advent calender and fell in love. One, I love scrapbooking and two because I know my kids will love it! We currently don't even own an advent calader and this one seems like the perfect one for our family. Thank you Stephanie for sharing this wonderful idea. Click here for the tutorial: Somewhat Simple


She then stuffed them with great ideas to do as a family:

Click on the images below to print them for your own calendar!


Check back soon to see the advent calender that I created:)